Key Highlights
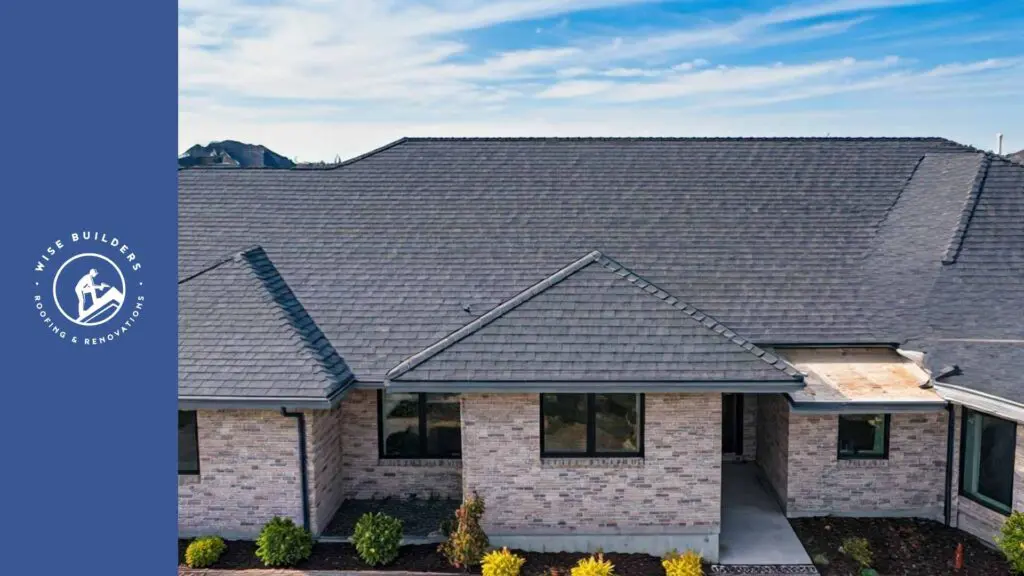
- Enhanced Curb Appeal: Architectural shingles offer a dimensional look that replicates the aesthetic of slate or wood shakes, significantly boosting your home’s visual appeal.
- Exceptional Durability: Crafted with a robust, multi-layered design, these shingles withstand harsh weather conditions, including high winds and heavy rain.
- Increased Longevity: Compared to traditional asphalt shingles, architectural options boast a longer lifespan, often exceeding 30 years with proper maintenance.
- Variety of Choices: Homeowners can select from a wide range of colors, styles, and profiles to complement their home’s architectural design.
- Professional Installation Recommended: Due to the complexity of the installation process, employing seasoned roofing contractors is advisable for optimal results.
Introduction
Architectural shingles have taken the roofing world by storm, captivating homeowners with their remarkable combination of durability and aesthetic appeal. While the installation process demands a meticulous approach, understanding the nuances of architectural shingle roofing can empower you to make informed decisions for your home improvement project. This comprehensive guide will equip you with the knowledge to transform your roof into a stunning and resilient crown for your dwelling.
Understanding Architectural Roofs
 Architectural asphalt shingles, often called dimensional or laminate shingles, represent a significant leap forward from traditional three-tab shingles. Unlike their flatter counterparts, architectural shingles are engineered with multiple layers of asphalt, resulting in a thicker, more substantial profile. This multi-dimensional design creates a visually captivating appearance reminiscent of high-end roofing materials like slate or wood shakes.
The allure of architectural shingles lies in their design versatility. Available in an array of colors, sizes, and shapes, these shingles provide homeowners with an expansive palette to complement various architectural styles. Whether your taste leans towards a classic, modern, or rustic aesthetic, there’s an architectural shingle style to match your vision.
The Evolution of Architectural Roofing
The emergence of dimensional shingles marked a pivotal moment in roofing history. Homeowners, once limited to the monotonous aesthetic of three-tab shingles, were presented with a visually dynamic alternative. This shift toward dimensional design stemmed from a desire to emulate the sought-after look of slate roofing, but at a more attainable price point.
The secret behind the three-dimensional effect lies in the construction of architectural shingles. Unlike traditional shingles, which consist of a single layer of asphalt, dimensional shingles are built with two or more layers. These layers are laminated together, with the top layer strategically cut to create the illusion of depth and texture.
This innovative approach to shingle design ushered in a new era of roofing possibilities. Architectural shingles provided homeowners with an opportunity to elevate the curb appeal of their homes while enjoying the benefits of a durable and long-lasting roofing solution.
Key Benefits and Aesthetic Appeal
One cannot overstate the aesthetic appeal of architectural shingles. Their dimensional profiles cast intricate shadows and create visually engaging textures that standard shingles simply can’t replicate. This added depth significantly enhances a home’s curb appeal, making it stand out from the crowd.
But the benefits extend far beyond aesthetics. Architectural shingles are engineered for durability. Their multiple layers provide robust protection against harsh weather conditions, including wind, rain, and hail. This translates to fewer repairs, less maintenance, and ultimately, cost savings for homeowners.
Moreover, the longevity of architectural shingles contributes to their overall value. With lifespans often exceeding 30 years, these shingles represent a wise investment for homeowners seeking enduring performance and aesthetic appeal.
Preparing for Your Architectural Roof Installation
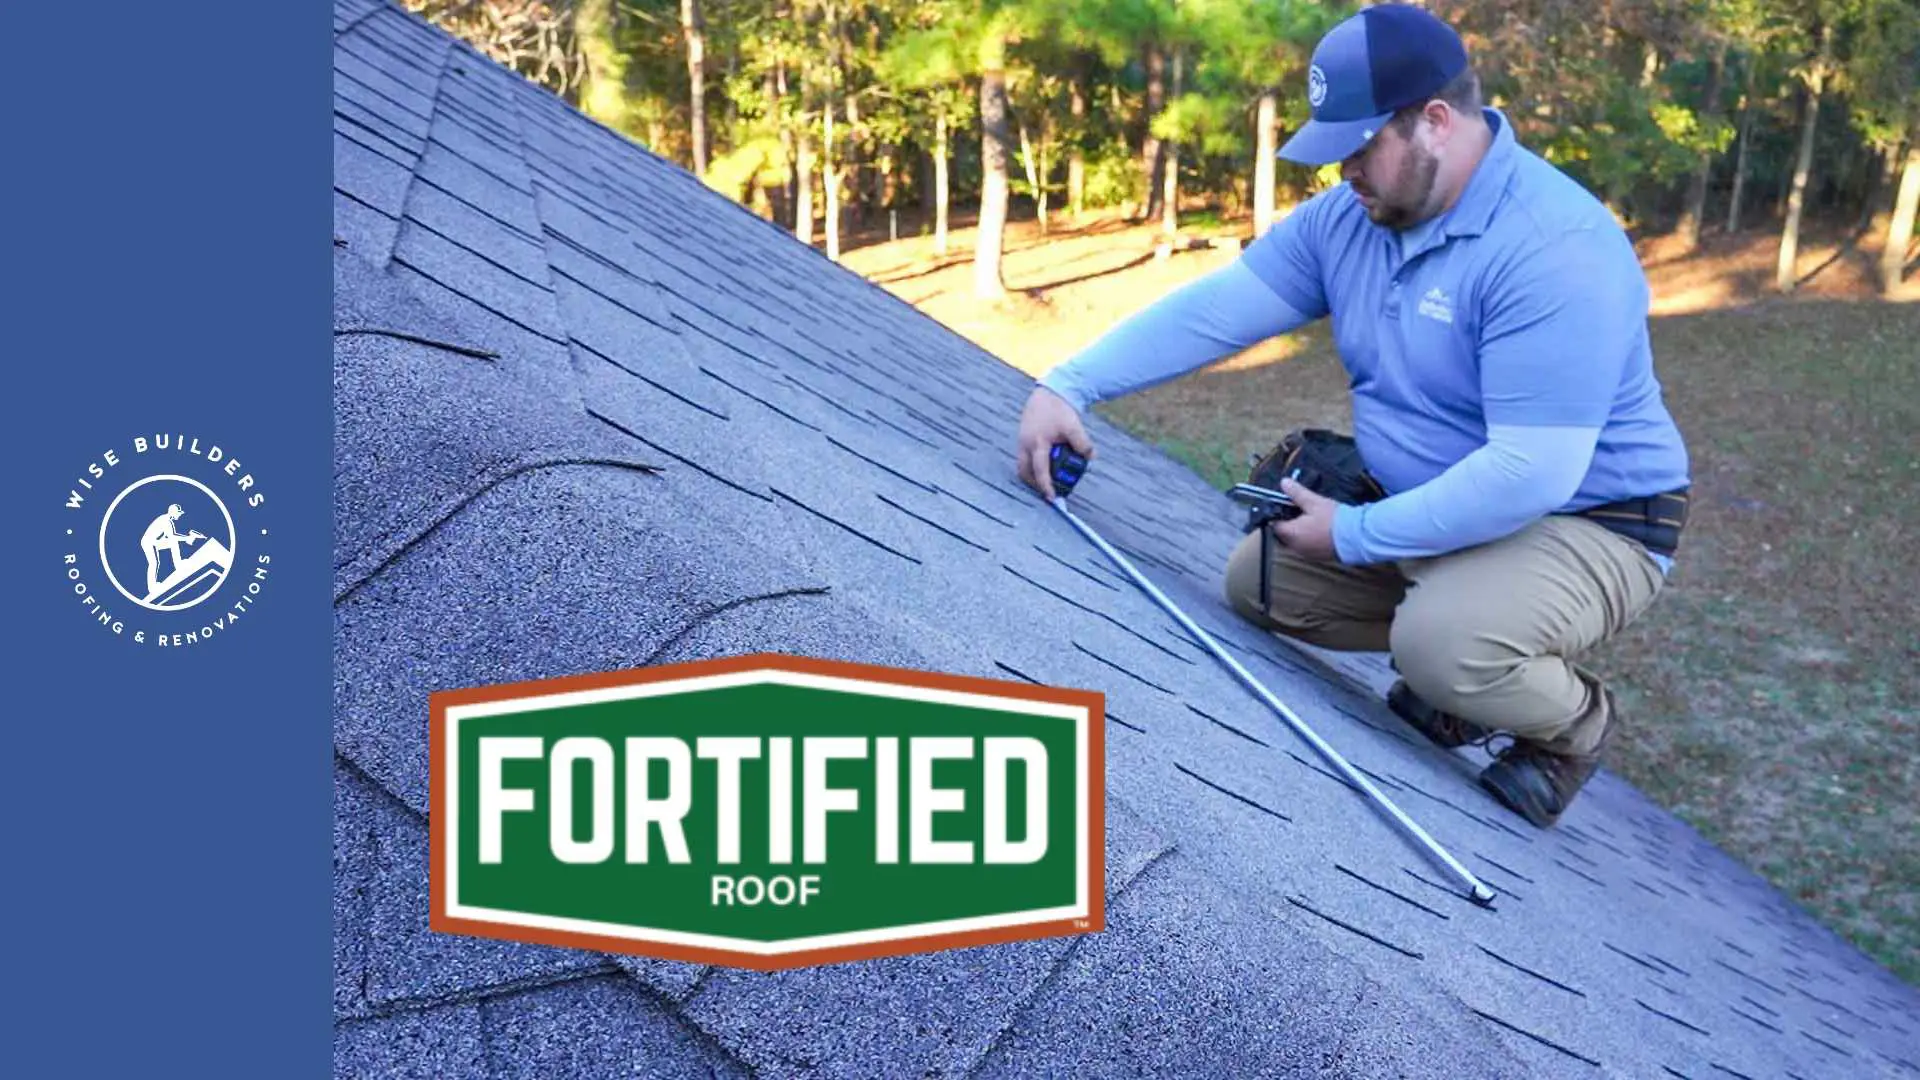
Embarking on an architectural roof installation necessitates careful planning and attention to safety. Before diving into the hands-on work, ensure you have the necessary safety equipment on hand, including a sturdy ladder, safety harness, and gloves. A clear workspace free from debris will also contribute to a smoother process.
Remember that a successful roofing project relies on a foundation of solid construction. Take the time to inspect your roof deck for any signs of damage or rot, addressing these issues before installing the new shingles.
Essential Tools and Materials
Gathering the right tools and materials is crucial for a smooth and efficient architectural roof installation. The following list encompasses the essentials for this project:
- Architectural Shingles: Select a style, color, and brand that aligns with your aesthetic preferences and budget.
- Roofing Nails: Choose corrosion-resistant nails specifically designed for roofing applications.
- Underlayment: Opt for a breathable, water-resistant underlayment, often composed of asphalt-saturated felt or synthetic materials.
- Starter Shingles: These specialized shingles establish a clean and secure edge along the eaves of your roof.
- Ridge Cap Shingles: Designed for the peak of your roof, these shingles provide a finished look and prevent water infiltration.
- Roofing Cement: A versatile sealant used for flashing, sealing around vents, and securing loose shingles.
Beyond these core materials, you’ll need a selection of tools, including a hammer or nail gun, utility knife, chalk line, and measuring tape.
Investing in high-quality materials and tools will contribute to a more successful and longer-lasting roof installation.
Safety Measures and Best Practices
Safety should be paramount throughout the entirety of your roofing project. Working at heights poses inherent risks, so taking the necessary safety precautions is non-negotiable. Always wear a safety harness securely anchored to a stable point on the roof.
Roofing work can expose you to harsh weather conditions, so stay vigilant about the forecast. Avoid working during periods of rain, lightning, or high winds. Extreme heat can also be hazardous, so stay hydrated and take frequent breaks.
Prevent water infiltration by diligently sealing all penetrations, such as vents, chimneys, and skylights, with appropriate flashing materials. Pay close attention to the overlapping of shingles to ensure a watertight seal.
Step-by-Step Guide to Installing Architectural Roofs
While the installation process for architectural shingles shares some similarities with traditional shingles, it demands a higher level of precision and attention to detail. This step-by-step guide will navigate you through the intricacies of installing architectural roofs, ensuring a successful outcome for your roofing project.
Remember, if you’re uncertain about any aspect of the installation, consulting with a professional roofing contractor is always a prudent choice.
Step 1: Assessing Your Current Roof Structure
Before laying down any new materials, thoroughly inspect your existing roof structure. If you’re replacing an older roof, take the time to remove the old shingles and dispose of them properly. Examine the roof deck for signs of damage, such as rot, soft spots, or loose boards.
Pay close attention to vulnerable areas around chimneys, skylights, and vents. These areas are prone to leaks, so ensure the flashing is intact and properly sealed. Reinforce or replace any damaged sections of the roof deck before proceeding with the installation.
A structurally sound roof deck is essential for ensuring the longevity and performance of your new architectural shingles. Addressing any existing issues at this stage will prevent future problems and ensure a successful installation.
Step 2: Installing the Underlayment
The underlayment serves as a crucial barrier against water infiltration, protecting your roof deck and home even if moisture penetrates the shingles. Begin by rolling out the underlayment horizontally along the eaves, working your way up towards the ridge.
Overlap the rows of underlayment by at least four inches, securing them with roofing nails. Ensure the underlayment lays flat and taut to prevent wrinkles or air pockets.
Proper underlayment installation is vital for creating a watertight seal beneath your roof shingles. Take your time and pay attention to detail during this stage to ensure optimal protection for your home.
Step 3: Laying the First Row of Shingles
The first row of shingles sets the stage for the entire installation, so accuracy is paramount. Begin by installing starter shingles along the eaves of your roof. These specialized shingles create a clean edge and prevent shingles from blowing off in high winds.
Align the starter shingles with the edge of the roof, allowing for a slight overhang. Secure them in place with roofing nails, spacing them according to the manufacturer’s recommendations.
Once the starter shingles are in place, you can begin laying the first row of architectural shingles, ensuring they overlap the starter shingles correctly. Maintain a consistent offset between consecutive rows to achieve the desired visual effect.
Step 4: Applying the Remaining Shingles
With the first row in place, continue installing the remaining shingles, working your way up the roof in a staggered pattern. Use a chalk line to ensure straight rows, and nail each shingle securely in place.
As you approach the top of the roof, you’ll need to install ridge cap shingles. These specialized shingles cover the peak of the roof and protect against water infiltration. Cut the ridge cap shingles to size and secure them with roofing nails.
While installation costs for architectural shingles tend to be higher than traditional shingles due to the complexity and weight, the long-term benefits in terms of durability and curb appeal outweigh the initial investment.
Conclusion
Architectural roofs are not just about functionality but also elevate the aesthetic appeal of your property. By understanding the evolution, benefits, and installation process of architectural roofing, you can make informed decisions to enhance your home’s value and appearance. Safety measures, essential tools, and step-by-step guidelines play a crucial role in ensuring a successful roof installation. Whether it’s assessing your current roof structure or applying the final shingles, each step contributes to the longevity and durability of your architectural roof. By following best practices and proper installation techniques, you can enjoy a stylish and resilient roof that lasts longer than traditional roofs. For expert guidance and assistance, feel free to reach out to professional roofers for a seamless installation experience.
At Wise Builders, We ensure our clients receive the best possible outcomes. Our commitment to quality workmanship and customer satisfaction is unwavering, making us the top choice for residential Roofing services in our community.
Frequently Asked Questions
How Long Does an Architectural Roof Last Compared to Traditional Roofs?
Architectural shingle roofs significantly outlast traditional asphalt shingles, often lasting between 30 to 50 years or more with regular inspections and proper maintenance. Their superior construction, thicker profiles, and ability to withstand harsh weather conditions contribute to their extended lifespan and energy efficiency.