Key Highlights
- Metal roofs offer exceptional durability, often lasting 40-70 years, significantly longer than traditional asphalt shingles.
- With energy efficiency and minimal maintenance, metal roofs are a sustainable choice for homeowners.
- Installing a metal roof can be a challenging DIY project; carefully consider the scope of work and your skill level.
- Proper planning and accurate measurements are crucial for purchasing the correct amount of materials.
- This guide provides a step-by-step overview of the installation process, outlining essential tools, materials, and techniques.
Introduction
This comprehensive guide will navigate you through the intricacies of metal roofing installation. We’ll equip you with the knowledge and resources to confidently tackle this rewarding home improvement project, from understanding the benefits of metal roofing to mastering the installation process. Beyond its renowned durability, metal roofing offers unparalleled aesthetic appeal, enhancing your home’s curb appeal with its modern, sleek look.
Understanding Metal Roofing

Metal roofing has steadily gained popularity among homeowners seeking durable and visually appealing alternatives to traditional roofing materials. Gone are the days when metal roofs were confined to barns and sheds; today’s metal roofing comes in an array of styles, colors, and finishes, complementing any architectural style.
Whether you opt for classic corrugated panels, sleek standing seam designs, or charming metal shingles that mimic the appearance of asphalt, you are making a long-term investment in a roofing system renowned for its resilience, energy efficiency, and low maintenance requirements.
The Basics of Metal Roofing
A metal roofing system comprises more than just the visible metal panels. It’s a sophisticated combination of components working together to deliver exceptional performance and protection. The foundation of any successful metal roofing project lies in understanding the different layers and their functions.
First and foremost are the metal panels themselves, available in various materials like steel, aluminum, copper, and zinc. Each material possesses unique characteristics impacting its durability, cost, and aesthetic appeal.
Beneath these panels lies a system of underlayment, flashing, and sealants designed to create a watertight barrier, preventing leaks and ensuring your home remains dry and protected from the elements.
Benefits of Choosing Metal for Your Roof
What sets metal roofing apart from its counterparts? Durability and longevity immediately come to mind. Metal roofs can easily withstand harsh weather conditions, including heavy rain, snow, and high winds. This inherent strength translates into remarkable longevity, with metal roofs often lasting 40 to 70 years, far surpassing the lifespan of traditional asphalt shingles.
Beyond their impressive durability, metal roofs contribute to a home’s energy efficiency. Their reflective properties deflect sunlight, minimizing heat absorption, especially during scorching summer months. This can lead to significant savings on cooling costs and contribute to a more comfortable living environment.
Moreover, let’s not overlook the aesthetic appeal of metal roofs. They offer a range of styles, colors, and finishes, complementing any architectural design. Whether you prefer a modern, rustic, or traditional look, there’s a metal roofing option to elevate your home’s curb appeal.
Essential Tools and Materials for Installation

Before you embark on your metal roofing installation journey, gathering the necessary tools and materials is essential. Having everything on hand ensures a smoother workflow and helps you stay organized throughout the process.
We’ll outline a comprehensive checklist of tools and guide you through selecting the right metal roofing panels based on your budget, location, and desired aesthetic. Remember, quality tools and materials are essential for a successful and long-lasting metal roofing installation.
Checklist of Tools Needed
Having the right tools is crucial for a successful and efficient metal roofing installation. Here’s a list of essential tools to ensure a smooth process:
- Safety Gear: Safety should always be your top priority. Equip yourself with safety glasses, work gloves, and a sturdy pair of work boots to protect yourself during the installation process.
- Cutting Tools: Metal roofing panels require precise cutting. A circular saw with a metal-cutting blade and tin snips for finer cuts are essential for achieving accurate measurements and clean cuts.
- Fastening Tools: Invest in a good-quality screw gun with a depth-setting feature, specifically designed for driving roofing screws through metal panels. Choose screws explicitly designed for metal roofing, as they are coated to prevent rust and corrosion, ensuring a watertight seal.
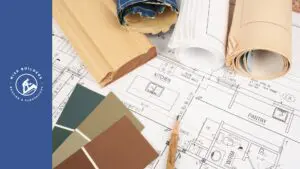
Selecting the Right Metal Roofing Panels
Metal roofing panels come in a variety of materials, each with its pros and cons. Consider your budget, desired aesthetic, and local climate when selecting your panels.
Steel is a popular choice due to its affordability and strength, while aluminum is prized for its corrosion resistance, making it ideal for coastal areas. Copper and zinc are premium options, admired for their natural beauty and longevity.
Consult a reputable roofing manufacturer to discuss your project specifics and receive expert guidance on selecting the most suitable metal roofing panels for your needs. They can advise you on panel types, finishes, and warranties to ensure a roof that stands the test of time.
Preparing Your Roof for Metal Roofing
Before installing your new metal roof, you must prepare the existing roof properly. This step involves removing the old roofing material and inspecting the roof deck for any damage or repairs. A solid, damage-free roof deck is crucial for a successful metal roofing installation.
Additionally, ensure proper ventilation during this stage. Inadequate ventilation can lead to moisture buildup and premature deterioration of roofing materials. Consult with a roofing professional to determine optimal ventilation solutions for your roof.
Removing Old Roofing Material Safely
Removing old roofing material can be a tedious and potentially hazardous task. Prioritize safety by wearing appropriate protective gear, including gloves, safety glasses, and a dust mask. Start by carefully removing existing shingles or other roofing materials, working in small sections to maintain control and prevent accidents.
As you remove the old materials, inspect the roof deck for any signs of damage, such as rot, water stains, or loose boards. Address any necessary repairs before proceeding with the metal roofing installation.
A solid and level roof deck is crucial for a successful metal roofing installation. If you encounter significant damage or are unsure about the condition of your roof deck, consult a qualified roofing professional for a thorough inspection and recommendations.
Step-by-Step Guide to Installing Metal Roofing

Now that you have a solid foundation, it’s time to install the metal roofing panels. This step-by-step guide will walk you through each stage of the process, from attaching the underlayment to securing the panels and adding the finishing touches.
Remember to refer to the manufacturer instructions for specific details and recommendations for your chosen metal roofing system.
Step 1: Installing the Edging
Start the metal roof installation by attaching the edging, a critical component that protects the roof’s edges, preventing water from seeping underneath. Measure the length of each eave and cut the drip edge flashing accordingly.
Install the drip edge flashing along the eaves, ensuring it overlaps at least an inch. Use roofing nails or screws specifically designed for metal roofing to secure the flashing to the roof deck.
Overlapping the flashing is crucial to create a watertight barrier that effectively directs water away from the roof’s edges.
Step 2: Applying the Underlayment
Applying a waterproof underlayment over the entire roof deck is the next step. Underlayment acts as a secondary barrier against moisture, protecting the roof deck from potential leaks or condensation.
Roll out the underlayment horizontally, perpendicular to the roof panels, ensuring it overlaps at least six inches at the seams. Use a staple gun or roofing nails to secure the underlayment to the roof deck.
For added protection, consider using a synthetic underlayment, renowned for its tear resistance and long-lasting performance.
Step 3: Laying the Metal Panels
With the underlayment secured, it’s time to install the metal panels, the heart of your new roofing system. Starting from one corner of the roof, carefully position the first panel, ensuring it aligns with the eave and rake edges.
Use a sealant tape designed for metal roofing to cover the seams where metal panels overlap, creating a watertight seal. This step prevents water from penetrating the roof, even during heavy rain or snow.
Accurate measurements are crucial for proper panel alignment. Double-check your measurements before securing each panel to ensure a visually appealing and structurally sound roof.
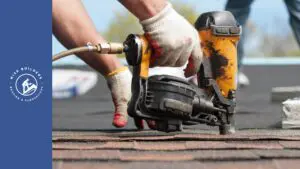
Step 4: Securing Panels and Sealing Joints
Secure the metal panels using roofing screws specifically designed for metal roofing. These screws, often equipped with rubber washers, create a watertight seal, preventing leaks.
Drive the screws straight through the panels and into the roof deck, taking care not to overtighten, which could damage the panels. Space the screws according to the metal roofing system manufacturer’s recommendations.
Apply a high-quality sealant to all joints and seams in the metal roofing system, paying particular attention to areas around flashing, vents, or other roof penetrations. This final layer of protection ensures a completely watertight seal, safeguarding your home from the elements.
Step 5: Adding the Finishing Touches
The final step involves installing the ridge cap, a crucial component that covers the ridge where two roof slopes meet, providing a finished look and preventing leaks. Cut the ridge cap to size and secure it over the ridge using ridge vents and appropriate fasteners at each end. Overlapping the ridge cap pieces ensures a watertight seal.
| Component | Description |
| Ridge Cap | Cover the ridge for a finished look and leak prevention. |
| Flashing | Install around chimneys, vents, and skylights for added protection. |
| Sealant | Apply to all seams and joints for a watertight seal. |
Addressing Common Installation Challenges
Even with careful planning and execution, you might encounter challenges during metal roofing installation. Factors such as weather conditions and the need for proper ventilation can impact the process.
We’ll address these common obstacles and provide solutions to ensure a successful and hassle-free installation, guaranteeing a roof that not only looks great but also stands the test of time.
Overcoming Weather-Related Obstacles
Weather can be unpredictable, especially in northern climates where extreme temperatures are common. Avoid installing a metal roof during rain, snow, or extremely hot weather.
High winds can also pose challenges during the installation process. If you must install in windy conditions, take extra precautions to secure panels properly and avoid working at heights if the wind speed becomes too dangerous.
Always prioritize safety and reschedule your installation if weather conditions compromise the quality of your work or pose a risk to your well-being.
Ensuring Proper Ventilation and Insulation
Proper ventilation and insulation are key to a long-lasting and energy-efficient roofing system. Ventilation allows air to circulate within the roof cavity, preventing moisture buildup, which can lead to mold growth and premature deterioration of roofing materials.
Install ridge vents and soffit vents to provide continuous airflow, allowing heat and moisture to escape. Adequate insulation complements ventilation, regulating temperature and improving your home’s energy efficiency.
Consult a roofing professional to determine the proper insulation R-value for your climate and ensure proper installation techniques are followed.
Maintenance Tips for Your New Metal Roof
Congratulations on your newly installed metal roof! Now it’s time to discuss maintenance practices that will keep it looking its best and ensure its longevity. While metal roofs are incredibly durable and low maintenance, periodic checks and upkeep can go a long way.
By following a few simple tips, you can protect your investment, prevent potential issues, and enjoy the lasting benefits of a well-maintained metal roof for decades to come.
Routine Maintenance Checks
Regular inspections are essential for identifying and addressing any potential issues with your new metal roof before they escalate. Conduct a visual inspection twice yearly, preferably in spring and fall, to check for signs of damage, debris buildup, or loose fasteners.
Pay attention to areas prone to wear and tear, such as flashing around chimneys, vents, or skylights. Look for any dents, scratches, or signs of rust and address them promptly to prevent further damage.
Remove accumulated leaves, branches, or other debris from the roof surface and gutters. Regular maintenance ensures that your roofing system functions optimally, preventing potential leaks, and extending the life of your metal roof.
Cleaning and Upkeep Best Practices
Maintaining the pristine appearance and durability of your metal roof requires simple yet effective cleaning practices. Use a garden hose with a spray nozzle to rinse off dirt, dust, and debris periodically. For tougher stains or algae growth, use a mild detergent specifically designed for metal roofs. Always consult the manufacturer’s recommendations before using any cleaning products.
Avoid abrasive cleaners, wire brushes, or pressure washers, as they can damage the protective coatings on metal panels, diminishing their lifespan and aesthetic appeal.
By following these cleaning best practices and conducting routine maintenance checks, you can ensure your metal roof remains a striking and resilient crown for your home for years to come.
Conclusion
Metal roofing offers durability and energy efficiency, making it a smart choice for homeowners. By following the step-by-step guide outlined and understanding the maintenance tips provided, you can ensure the longevity of your metal roof. Addressing common challenges like weather obstacles and ventilation issues is crucial for a successful installation. Remember, routine maintenance checks and proper cleaning practices will help preserve your investment. If you’re considering installing a metal roof, consult a professional for expert guidance and to maximize the energy efficiency benefits that come with it.
At Wise Builders, we ensure our clients receive the best possible outcomes. Our commitment to quality workmanship and customer satisfaction is unwavering, making us the top choice for residential Roofing services in our community.
Frequently Asked Questions
Do I Need a Professional to Install a Metal Roof?
While metal roofing installation can be handled by experienced DIYers, consulting a professional is recommended, especially for complex roofs. A professional installer ensures adherence to manufacturer’s instructions, local codes, and provides peace of mind knowing the job is done correctly.
What Are the Energy Efficiency Benefits of Metal Roofing?
Metal roofing enhances energy efficiency through its reflective properties. It acts as a cool roof, deflecting sunlight and reducing heat gain. Combined with proper insulation, it can lead to significant savings on cooling costs.