Key Highlights
- Chimney flashing is vital in preventing water damage to your roof and home.
- This guide provides a DIY approach to installing chimney flashing on shingle roofs.
- We’ll cover different flashing types, tools needed, and safety measures.
- Learn to install base flashing, step flashing, and counter flashing for optimal protection.
- Master these techniques for a professional-looking finish and long-lasting results.
Introduction
Chimney flashing is a critical element of a sound roofing system, especially for shingle roofs and slate roofs. It creates a watertight seal between the chimney and the roof, preventing leaks and potential water damage. While chimney flashing installation is often left to professionals, this guide provides homeowners with the knowledge and steps to tackle this project themselves using roofing cement.
Understanding Chimney Flashing
Before we jump into the installation process, it’s essential to understand what chimney flashing is and why it’s so important for your roof’s integrity.
Chimney flashing is essentially a system of metal sheets installed around the chimney, where it intersects with the roof. These precisely cut and bent sheets are layered to direct water away from this vulnerable area, preventing it from seeping into your home’s structure.
The Role of Chimney Flashing in Roof Protection
Chimney flashing is a critical element of a sound roofing system, especially for shingle roofs and slate roofs. It creates a watertight seal between the chimney and the roof, preventing leaks and potential water damage. While chimney flashing installation is often left to professionals, this guide provides homeowners with the knowledge and steps to tackle this project themselves using roofing cement.
The key to effective flashing lies in achieving a watertight seal. This is done by layering different types of flashing and sealing them properly. Remember that even the smallest gap or improperly sealed joint can provide an entry point for water, compromising your roof’s integrity and leading to costly repairs.
The flashing is integrated with the mortar joints of the chimney, further strengthening its effectiveness in preventing leaks. This integration ensures that water running down the chimney or driven by the wind cannot penetrate the roof structure.
Types of Chimney Flashing Commonly Used on Shingle Roofs
Several types of flashing work together to create a comprehensive system. Understanding the function of each type will help you grasp the overall installation process better:
Base flashing: This is the first layer of defense, installed over the shingles and extending up the bottom of the chimney. Base flashing is crucial for directing water away from the joint where the chimney meets the roof.
Step flashing: These L-shaped pieces of metal are installed over the base flashing. Each piece is woven into the shingle courses as they go up the sides of the chimney, effectively channeling water over the shingles.
Cap flashing: Also known as counter flashing, this type of flashing covers the top edge of the base flashing and is tucked into the mortar joint of the chimney. It provides a durable and aesthetically pleasing finishing touch.
Preparing for Chimney Flashing Installation

Before starting your flashing project, adequate preparation is crucial for a smooth and successful installation. This includes gathering the necessary tools and materials, understanding the steps involved, and prioritizing safety.
Remember, working on the roof can be dangerous, and taking proper safety precautions is non-negotiable. Make sure to have a stable ladder, secure footing, and if possible, a helper to assist you.
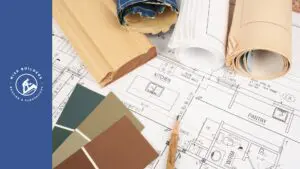
Tools and Materials Needed for Effective Flashing
Here’s what you’ll need to gather before starting your chimney flashing installation:
Materials:
- Sheet metal: Galvanized steel, aluminum, or copper (depending on your roof type and preference)
- Roofing nails: Galvanized nails for securing the flashing
- Roofing cement: For sealing and waterproofing
- Self-adhering roofing membrane: (Ice and water barrier)
Tools:
- Tin snips for cutting flashing
- Hammer
- Caulking gun
- Utility knife
- Measuring tape
- Level
Having these tools and materials on hand ensures a more efficient workflow and helps prevent unnecessary delays during your installation process.
Safety Measures to Consider Before Starting
Your safety should always be the top priority when working on a roof. Take the following precautions:
Safety gear: Wear appropriate safety gear, including a roof harness with a rope grab and secure roof anchor, sturdy shoes with good traction, safety glasses, and work gloves.
Ladder safety: Ensure your ladder is in good condition and placed on firm, level ground. Use a ladder stabilizer for added safety. A good rule of thumb is to extend the ladder at least three feet above the roofline to allow for easy and safe access.
Roof deck inspection: Before stepping onto the roof, visually examine the roof deck for any signs of damage, such as soft spots or loose boards. If possible, avoid walking on wet or icy roofs. Be mindful of power lines and other overhead hazards.
Step-by-Step Guide to Installing Chimney Flashing
Now that you have a better understanding of chimney flashing and you’ve prepared your tools and prioritized safety, let’s move on to the step-by-step installation process.
These steps are a general guideline for installing chimney flashing on a shingle roof. The specific details may vary depending on your roof’s complexity, the type of metal you’re using, and local building codes. It’s always recommended to consult with a professional roofing contractor for guidance tailored to your specific situation.
Removing Old or Damaged Flashing
If you’re replacing existing flashing, the first step is to carefully remove the old flashing components, including the old flange if necessary. Use a chisel and hammer to gently remove old caulk or roofing cement that may be securing the flashing to the chimney and roof.
Be careful not to damage the surrounding shingles or create any unnecessary holes in the roof deck. Once the old flashing is removed, inspect the area for any signs of water damage or rot. Address these issues before installing the new flashing.
Remember, proper disposal of old flashing is important. Contact your local waste management service for guidelines on disposing of construction debris.
Measuring and Cutting Base Flashing
Accurate measurements are key to ensuring your base flashing fits snugly against the chimney and roof, including taking the roof slope into account. Start by measuring the width of the chimney base. Add a few inches to allow for an overlap onto the roof and up the side of the chimney.
Transfer these measurements onto your sheet metal and carefully cut it using tin snips. If your chimney has a complex shape, consider having your base flashing custom-made at a sheet metal shop for the best fit.
Test-fit the base flashing against the chimney before proceeding to the next step. Make any necessary adjustments to ensure a tight and flush installation.
Securing Base Flashing to the Chimney and Roof
Apply a thick bead of roofing cement to the area where the base flashing meets the roof. Carefully position the base flashing over the cement, ensuring it sits flush against both the chimney and the roof. Use roofing nails to secure the base flashing to the roof deck.
Next, apply roofing cement to the portion of the base flashing that extends up the side of the chimney. Use a trowel to create a smooth and even surface, and ensure you also secure a piece of cap flashing in this process. This step is crucial in preventing water from seeping between the flashing and the chimney.
Properly installed base flashing should follow the slope of the roof and create a seamless transition, effectively diverting water away from the chimney base.
Advanced Chimney Flashing Techniques

With the base flashing securely in place, you can move on to installing the step flashing and counter flashing. These techniques provide additional layers of protection against water intrusion.
Take your time to understand the function and installation process of each type of flashing. Accurately following these steps will ensure your flashing installation provides optimal leak protection for your home.
Installing Step Flashing for Extra Leak Protection
Step flashing is a crucial element in achieving comprehensive leak protection around your chimney. These pre-bent, L-shaped pieces of flashing, including the first piece of flashing, are designed to be integrated with your shingle courses.
Begin by installing a piece of step flashing along the side of the chimney, ensuring the short leg is tucked under the shingle course and the long leg extends over the base flashing. Secure it with a roofing nail.
Continue adding step flashing pieces as you lay each subsequent shingle course. Overlapping each piece by at least two inches provides optimal water resistance. Always ensure the shingles overlap the step flashing, keeping a natural flow and preventing water from backing up behind the flashing.
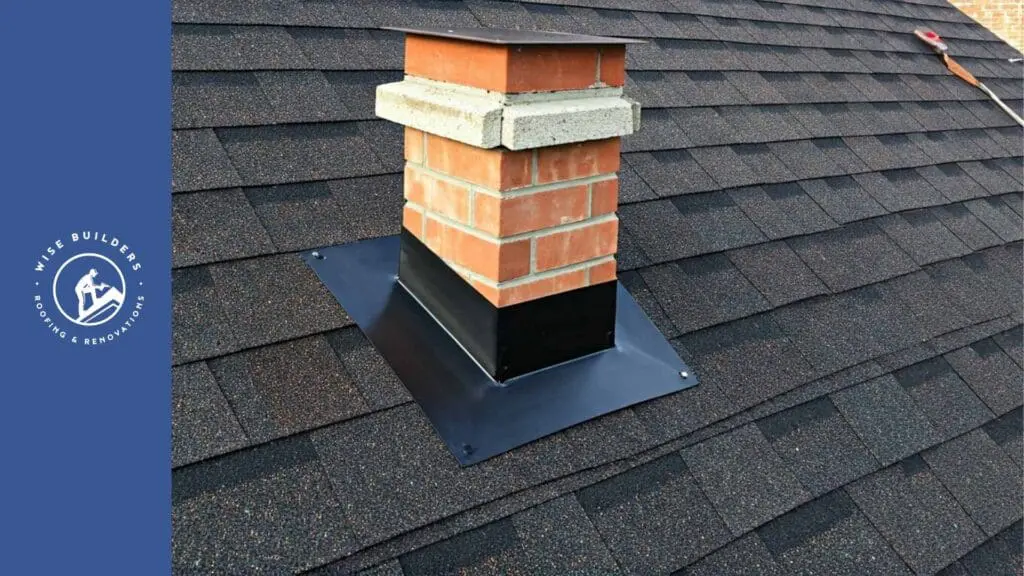
Applying Counter Flashing for Enhanced Durability
Counter flashing, also known as cap flashing, serves as the final line of defense and adds durability to your chimney mortar joints and flashing system. This type of flashing is installed over the step flashing and tucked into the mortar joint of the chimney. It effectively covers the exposed edges of the step flashing, creating a seamless and watertight seal.
To install counter flashing, carefully cut a groove into the mortar joint using a grinder and masonry wheel. The groove should be deep enough to accommodate the counter flashing and allow for proper sealant application.
Slide the counter flashing into the groove and secure it with masonry nails or sealant. Apply a high-quality sealant along the top edge of the counter flashing to create a durable weatherproof barrier.
Finishing Touches for a Professional Look
After successfully installing your chimney flashing system, it’s time to add the finishing touches that will give your work a professional look and ensure long-lasting performance.
This includes sealing any potential gaps and thoroughly inspecting your work for any missed spots or areas that might require adjustment. A meticulous approach at this stage will guarantee the effectiveness of your chimney flashing for years to come.
Sealing the Flashing Against Weather Elements
Thoroughly sealing all seams and joints is crucial in maximizing the lifespan of your chimney flashing and preventing future leaks. Use a high-quality roofing caulk that’s specifically designed for exterior applications and compatible with the type of metal used for your flashing.
Apply a continuous bead of caulk along any areas where two pieces of flashing overlap, paying close attention to the corners. Make sure to fill any gaps or cracks in the mortar joints around the flashing with caulk as well.
Allow the caulk to cure completely according to the manufacturer’s instructions before exposing it to rain or snow. This will ensure a watertight seal that can withstand harsh weather elements.
Inspecting the Flashing for Any Missed Spots
Once the sealant has cured, it’s critical to perform a thorough inspection of your chimney flashing to identify any missed spots or areas that might require additional attention.
Carefully examine all seams, joints, and corners, looking for gaps, cracks, or areas where the sealant might not have fully adhered. A small mirror can be helpful for inspecting hard-to-reach areas.
Remember that even a tiny gap can compromise the watertight seal of your flashing system and lead to potential leaks. By addressing any issues at this stage, you can prevent costly repairs down the line and ensure your chimney flashing provides optimal protection for your home.
Maintenance Tips for Chimney Flashing

While a properly installed chimney flashing system can last for many years, regular maintenance is essential for maximizing its lifespan and ensuring your home remains protected from water damage.
Performing routine inspections and addressing minor issues promptly can prevent them from escalating into major problems that require costly repairs or even a complete replacement of your flashing system.
Regular Inspection Schedule
Incorporate a regular inspection of your chimney flashing as part of your overall roof maintenance routine. It is recommended to inspect your flashing at least twice a year, ideally in the spring and fall, to check for any signs of damage or deterioration.
Pay attention to the condition of the sealant around the flashing. Over time, sealant can dry out, crack, or pull away from the flashing, creating vulnerabilities for water intrusion. If you notice any signs of damage, reseal those areas with fresh caulk immediately.
Additionally, keep an eye out for any signs of rust, corrosion, or loose or missing pieces of flashing. These issues should be addressed by a qualified roofing professional to ensure the integrity of your roof.
Identifying and Addressing Common Issues
Several common issues can arise with chimney flashing over time that may necessitate repair or replacement. Being able to identify these problems early on can help you avoid bigger headaches down the line.
One common issue is rust or corrosion, especially if you have older lead flashing or metal flashing. If you notice significant rust or corrosion, it’s generally advisable to replace the entire flashing system. Patching rusted areas might seem like a quick fix but often leads to recurring problems.
Another issue to watch out for is cracked or missing caulk. As mentioned earlier, sealant degradation is normal over time, but if left unaddressed, it can compromise the watertight seal of your flashing.
Conclusion
Chimney flashing is crucial for protecting your roof from leaks and water damage. By following the step-by-step guide outlined in this blog, you can ensure a successful installation that enhances the durability of your shingle roof and other roofing materials. Remember to prioritize safety measures and use the right tools and materials to achieve effective flashing. Regular maintenance and inspections are key to prolonging the life of your chimney flashing. If you have any doubts or questions about chimney flashing, refer to our FAQ section for more insights on repair, replacement, and inspection frequency. Keep your roof well-protected with proper chimney flashing techniques.
At Wise Builders, We ensure our clients receive the best possible outcomes. Our commitment to quality workmanship and customer satisfaction is unwavering, making us the top choice for residential Roofing services in our community.
Frequently Asked Questions
Can Chimney Flashing be Repaired or Must it be Replaced?
The decision to repair or replace a leaking chimney flashing depends on its overall condition and the extent of the damage. Minor issues like loose flashing or cracked caulk can often be repaired. However, extensive rust, corrosion, or multiple leaks might necessitate a complete replacement to restore the flashing lifespan and effectively prevent future roof leaks.
How Often Should Chimney Flashing be Inspected?
Regular chimney flashing inspection is key to leak prevention. It’s recommended to inspect your flashing at least twice a year during routine roof maintenance or opt for a professional inspection. This helps catch problems early, preventing major damage and costly repairs.